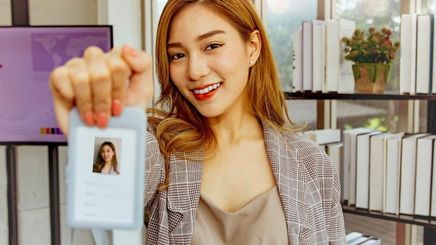
Having an ID picture taken comes with its inconveniences, like terrible lighting or an impatient photographer. While these snapshots are only for a handful of people to see, they stay with you for a long time, sometimes up to 10 years. It's not a crime to want to look somewhat presentable.
If you've ever wondered, "Why do I look different in these photos?" Rest assured it's not because you're incapable of taking good pictures. You just need to add a few tricks to your beauty arsenal. These simple beauty tips will help you get the best images for your driver's license, student ID, or passport –no Photoshop required!
Skip the Translucent Powder
can be quite useful, particularly for those with oily skin. It rapidly absorbs excess grease and reduces shine. However, translucent varieties tend to create a white cast on your face when captured in flash photography. Moreover, it tends to settle into and makes your skin look dry,
Leave the powder at home and focus on face prep instead. Use Dove Facial Cleansing Mousse Moisture Care to create a clean, oil-free base. It's formulated with 40% Active-boost serum and to help the makeup adhere better and keep your skin plump for up to 24 hours. After that, apply a light moisturizer and a matte foundation. A blotting paper is a good way to get rid of excess oil, so keep one in your bag.
Get a Natural Glow
Iconic Bretman Rock once dropped this pearl of wisdom: don’t put on shimmery highlighter when taking an ID picture. It can make your face look sweaty and oily under harsh, fluorescent lighting.
For that natural glowing-from-within look, prime your skin with POND'S Bright Triple Glow Serum. It has Gluta-Boost-C, , and hyaluronic acid that brightens your skin, minimizes pores, and softens your skin.
Do the Reverse Contour Method
Studio lights can be unforgiving and make your face look muddy if your contours are not well-blended. To make your features pop, grab a foundation stick or concealer one shade lighter than your skin and use it to highlight your brow bones, nose bridge, nose tip, and undereye area. This trick emphasizes the natural contrast between the center and sides of your face.
If contouring is a must for you, stick to a creamy, buildable formula and shade your face in light layers. Blend any harsh lines with a beauty sponge you've used to apply your base makeup as the leftover foundation will help soften the color.
Go for Light and Neutral Shades
This is not the time to do . You want to look timeless since you'll have the same ID picture for at least the next five years. Instead, go for a . It's easy to recreate, even for beginners.
First, draw short, feathery strokes with a pencil to fill your brows. You can skip this step if you have naturally . For the eyes, blend a matte brown color all over the lids. Finally, curl your natural lashes from the roots and apply mascara. You can also put on falsies that flatter your eye shape.
Match the Blush With Your Lips
One valuable tip: use the same shade for your lips and ! The monochromatic combo gives you effortless freshness. If you have light skin, a baby pink or soft peach color will suit you. For , rosy pink and wine-toned shades will look best. You can go ham with the blush because the camera will wash out your complexion but be light-handed when applying the lip color. A stain will look most natural and timeless.
Part Your Hair to the Side
Everyone has a certain level of facial asymmetry that can become more obvious in photos. Some might have one eye smaller than the other, a crooked smile, or a shorter brow on one side. To create balance, you can change the way you .
Take a selfie and see which side of your face is smaller or has droopy features. This side shouldn’t be obstructed by hair, so sweep your locks over to the other side to cover the larger part of your face. With this hack, you’ll look good from every angle.
Improve Your Posture
Want to know how to look good in photos? Chin up and pull your shoulders back! makes you look more confident and keeps a from hijacking your ID picture. As soon as you sit in the booth, stretch your neck out a little, unhunch your back, and relax your arms. Place your hand on your waistband to straighten your shoulders instantly.
Smile, But Only a Little
Sometimes the secret to taking a good ID picture is just right. A toothy grin might be cute, but it's not allowed in biometric photos. Serving your best top-model face, however, is not against the rules! Slightly lift the corners of your mouth, and don't press your lips together. This facial expression suits all and makes you seem more relaxed.
Securing a stellar ID picture is not impossible, especially if you follow the tips above. Prepare your clothes the night before and wake up early so you have time to do your makeup. You can’t afford to in your photo, so plan your day ahead. You've got this!